Address
304 North Cardinal
St. Dorchester Center, MA 02124
Work Hours
Monday to Friday: 7AM - 7PM
Weekend: 10AM - 5PM
Address
304 North Cardinal
St. Dorchester Center, MA 02124
Work Hours
Monday to Friday: 7AM - 7PM
Weekend: 10AM - 5PM

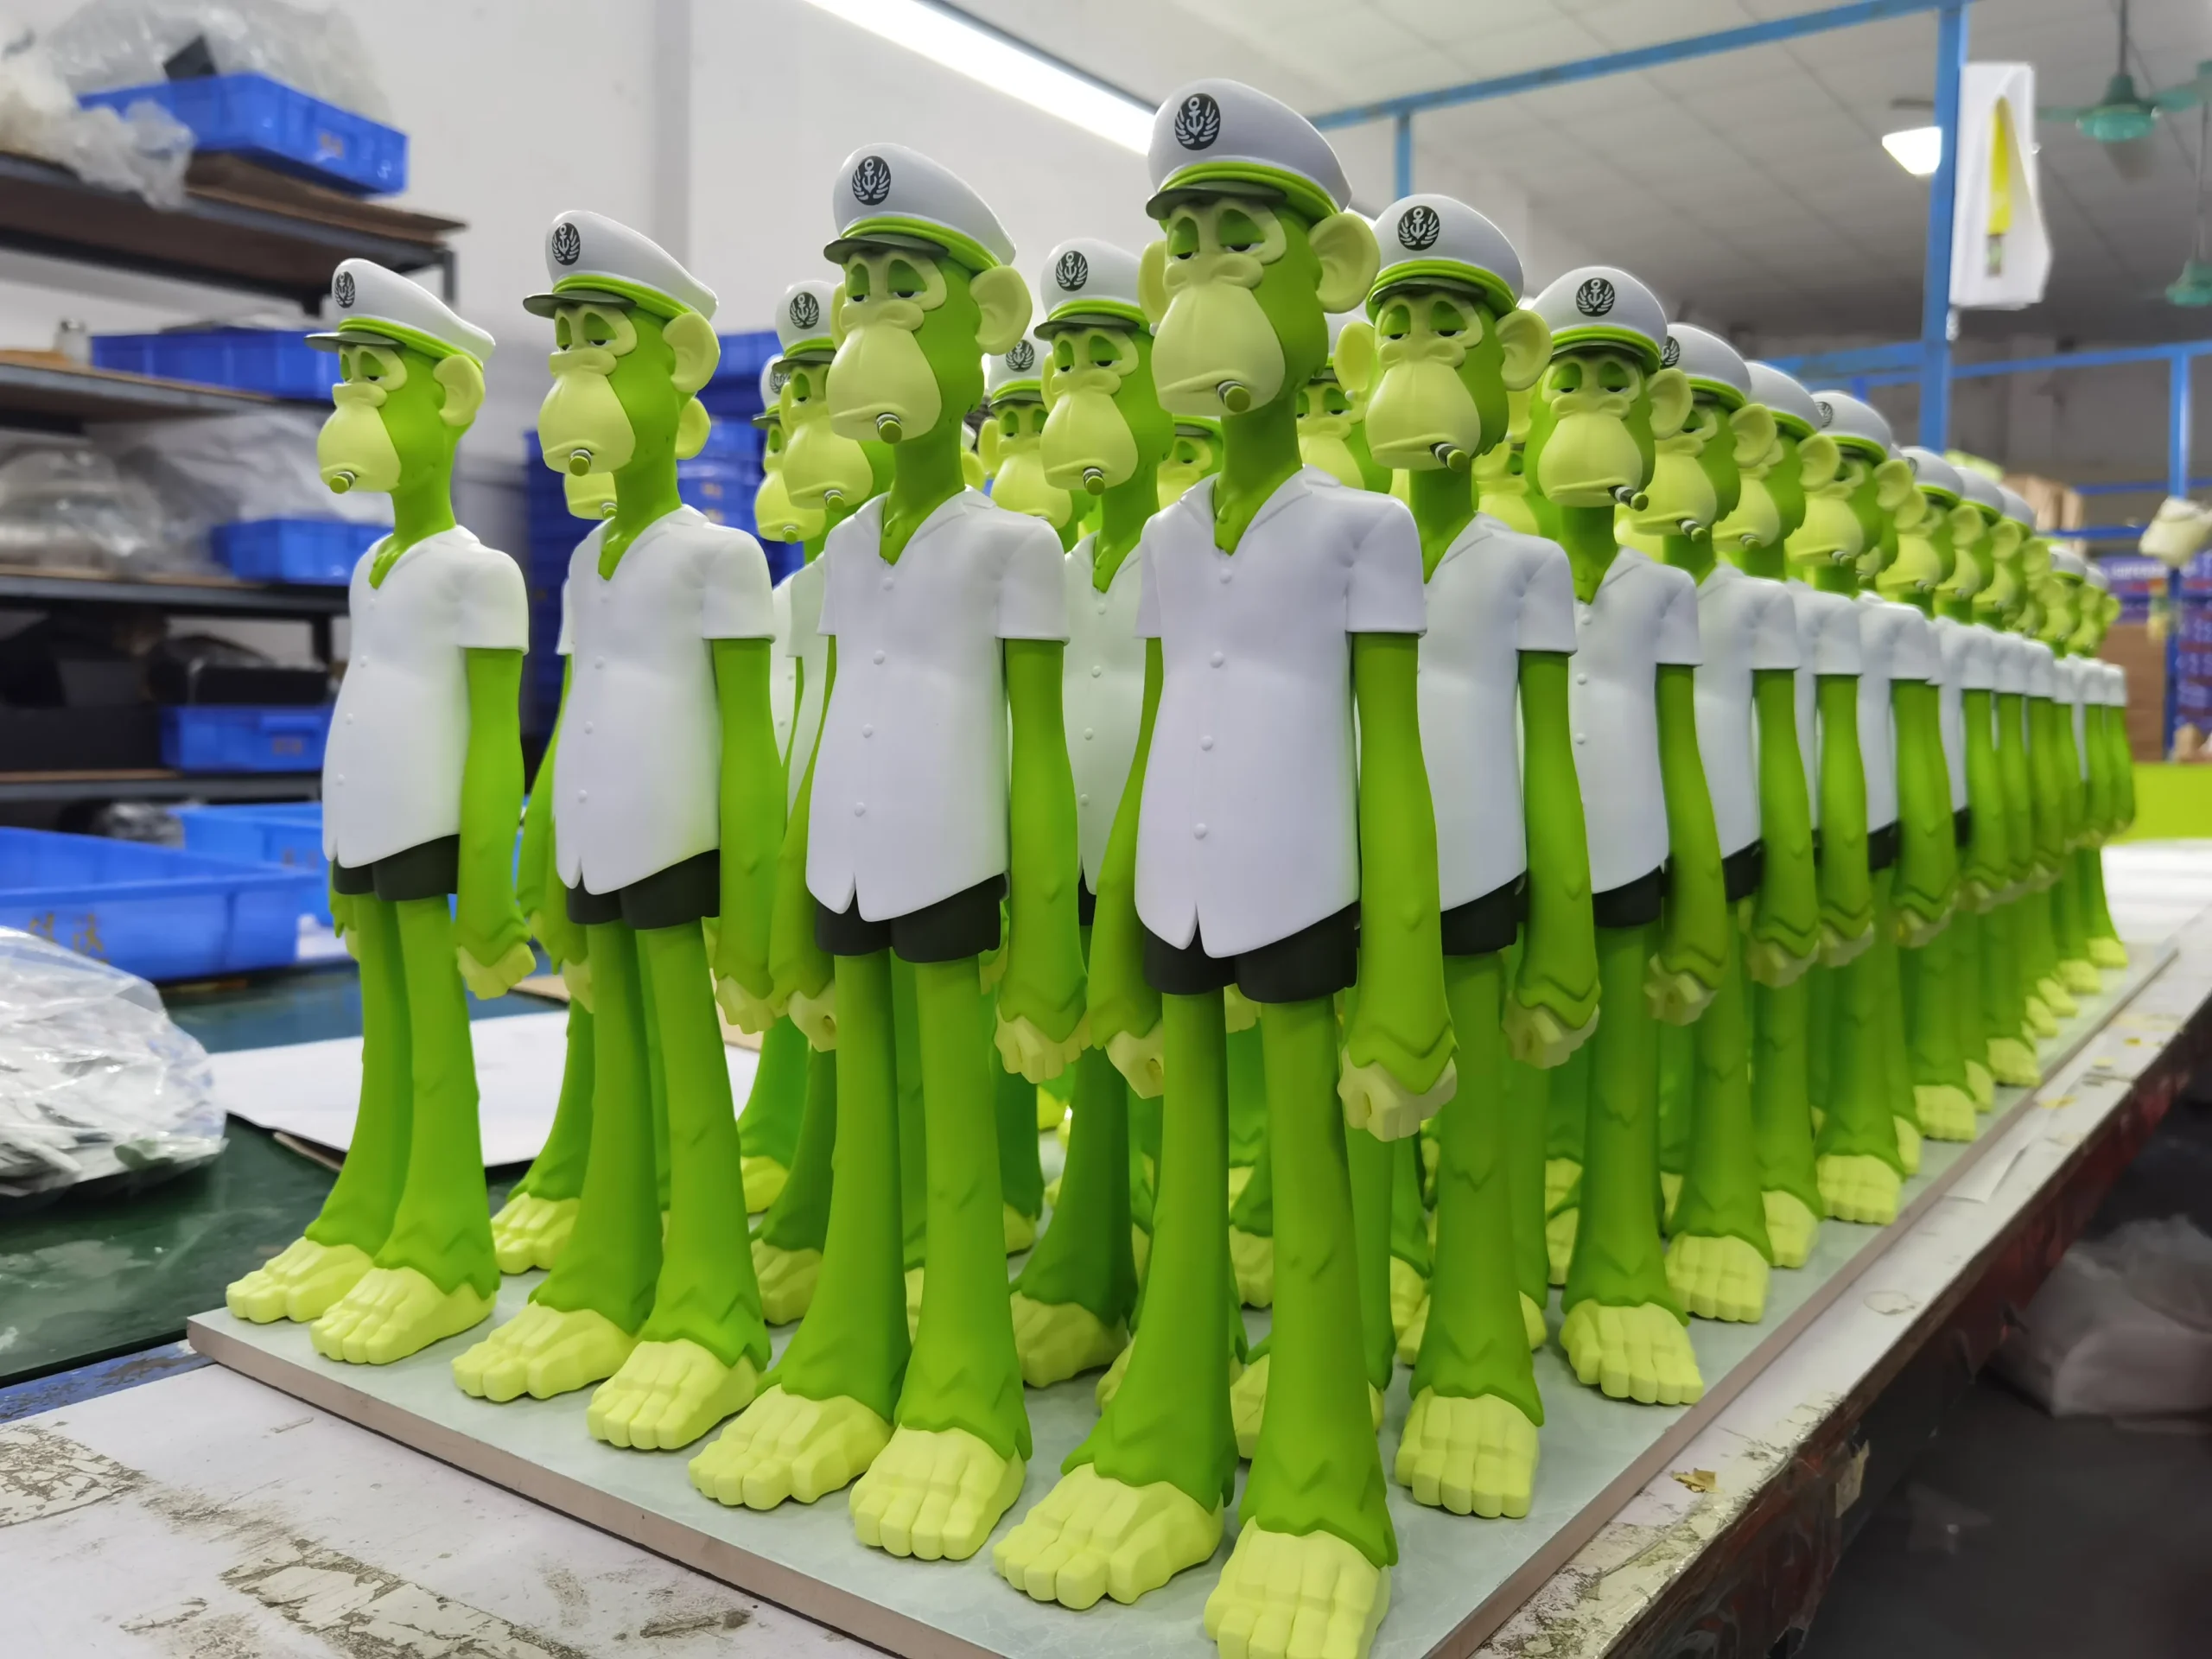
Custom Figure Factory
Custom Figure Factory
Resin Figures are a type of collectible toy made from liquid synthetic resin (usually PU resin or epoxy resin) shaped through silicone molds. They are characterized by a hard and delicate texture, high detail fidelity, and a heavy feel, and are often used to create high-quality limited edition figures, statues, premium blind boxes, and creative art toys, with a greater emphasis on detail representation compared to PVC plastic material.
The manufacturing process of resin figures mainly relies on manual operations, involving the production of silicone molds, the shaping of blanks, sanding, coloring, and assembly. First, let’s understand the method of making resin figure molds: typically, silicone is the preferred material for these molds because it can form a smooth surface, making demolding easier. Compared to vinyl and injection-molded PVC molds, silicone molds have cost advantages. However, their reusability duration is shorter, so in large-scale production, it is usually necessary to make multiple identical molds to meet efficiency requirements.
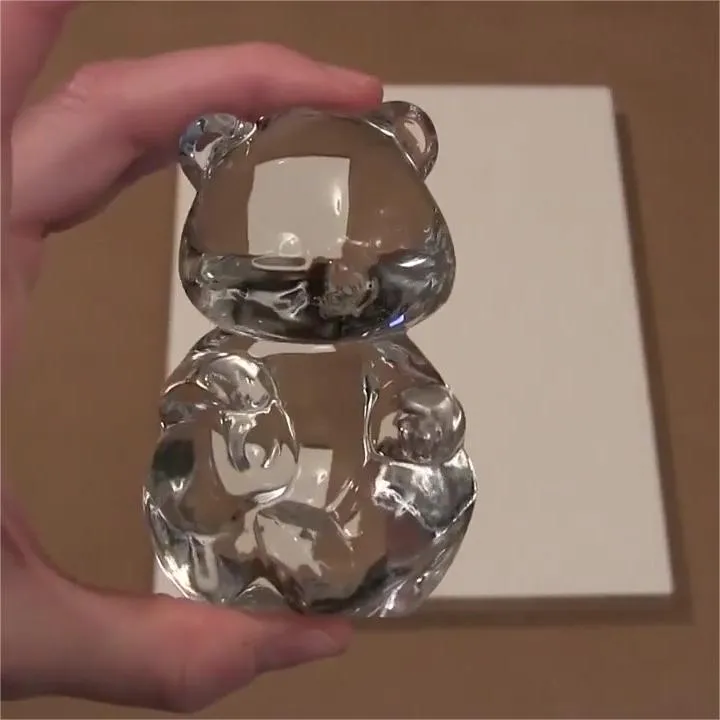
Prepare Polished Resin Master Model
Making a silicone mold requires a prototype sample. This prototype sample can be 3D printed or handcrafted from clay.
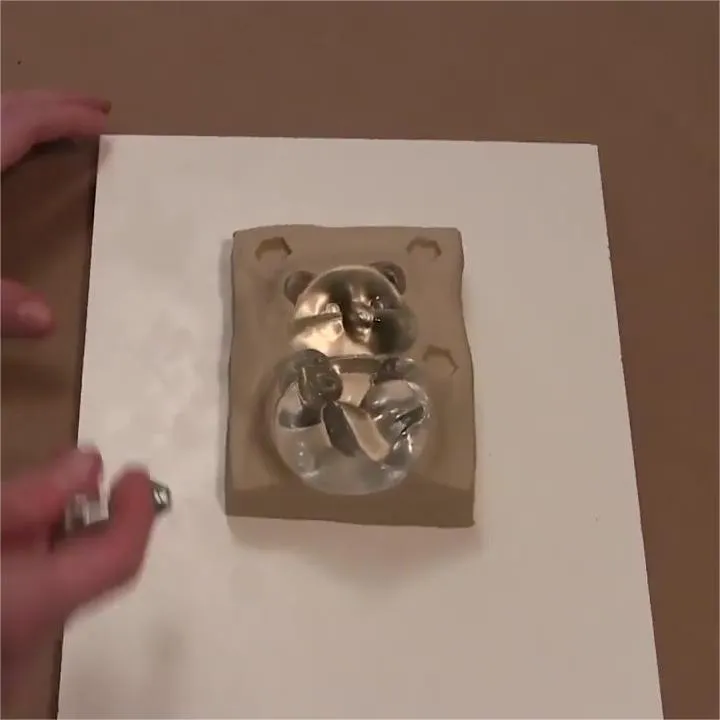
Begin making one half of the mold
Shape the clay to match the resin model and create locating holes around the perimeter to prevent shifting or deformation, thus facilitating a tight connection between the two halves of the mold.
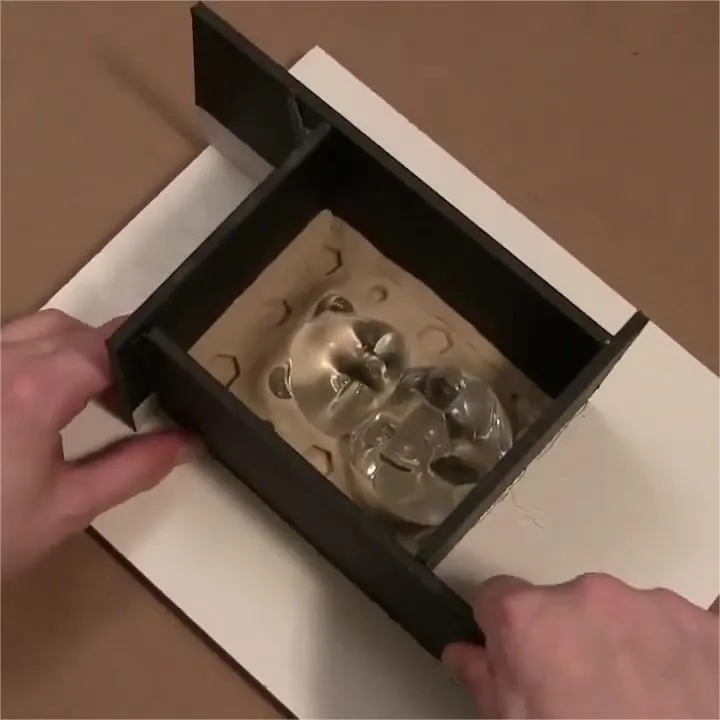
Making the mold frame
Create a frame around the clay to serve as the mold frame. Completely seal the seams with a hot glue gun to prevent liquid silicone from leaking out after pouring.
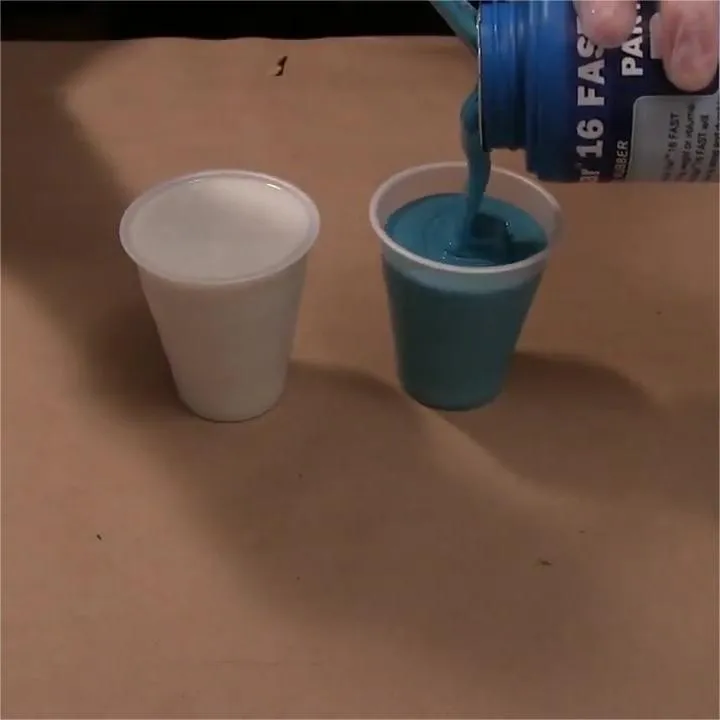
Preparing the silicone solution
Mix the silicone with the curing agent in a ratio of 100:2 according to the required amount. Ensure thorough and even mixing to avoid incomplete curing.
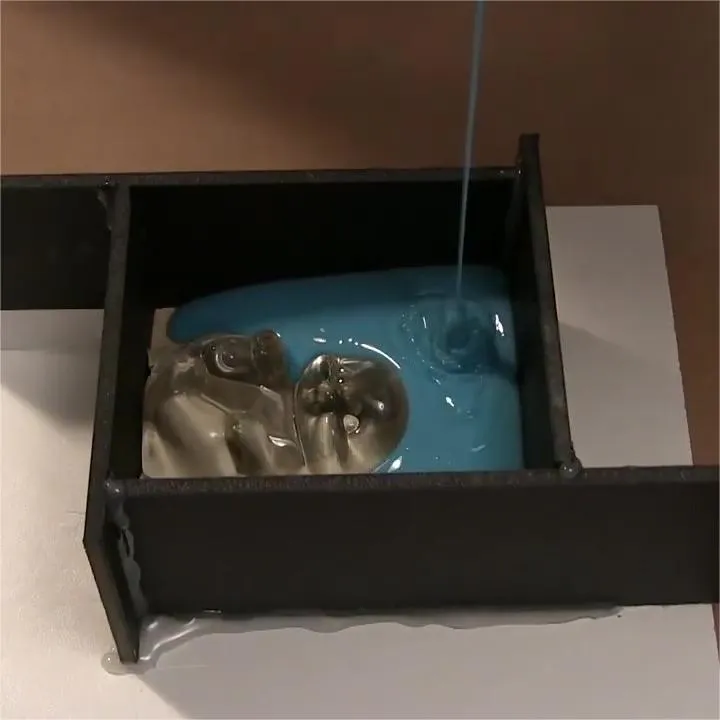
Pour in the silicone
Slowly pour the thoroughly mixed silicone in a thin stream to minimize air bubbles.
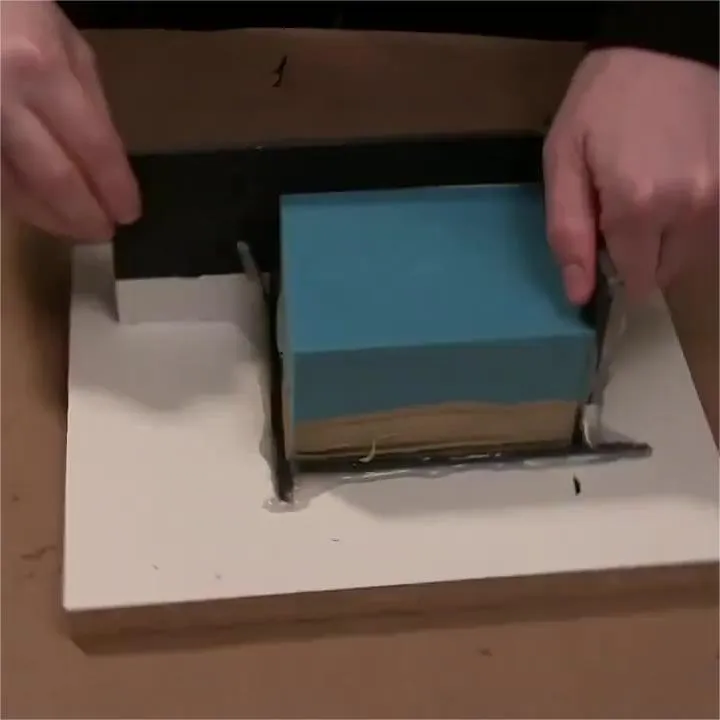
Wait for complete curing
After approximately 6-8 hours, when the liquid silicone has fully cured, the mold can be opened, completing one half of the two-part mold.

Repeat the above steps
Remove the clay from the bottom, flip the mold over, and repeat the above steps to create the other half of the silicone mold.
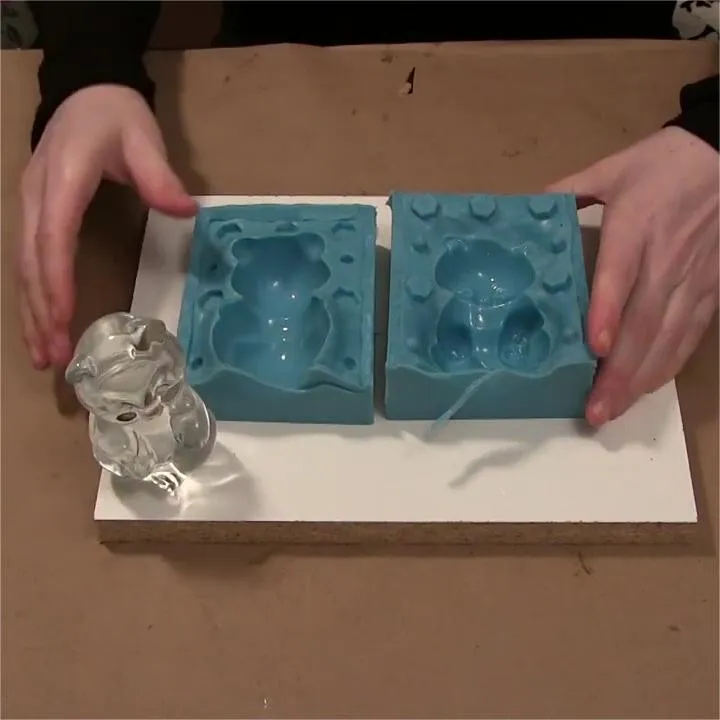
Obtain the final resin figure mold
After curing, remove the mold frame to complete the creation of the two halves of the silicone mold.
Making resin toys requires certain skills and experience. First, it is necessary to prepare the tools and materials, such as models, resin, hardeners, and pigments. Then, follow the design drawings or hand-drawn sketches, and proceed step by step.
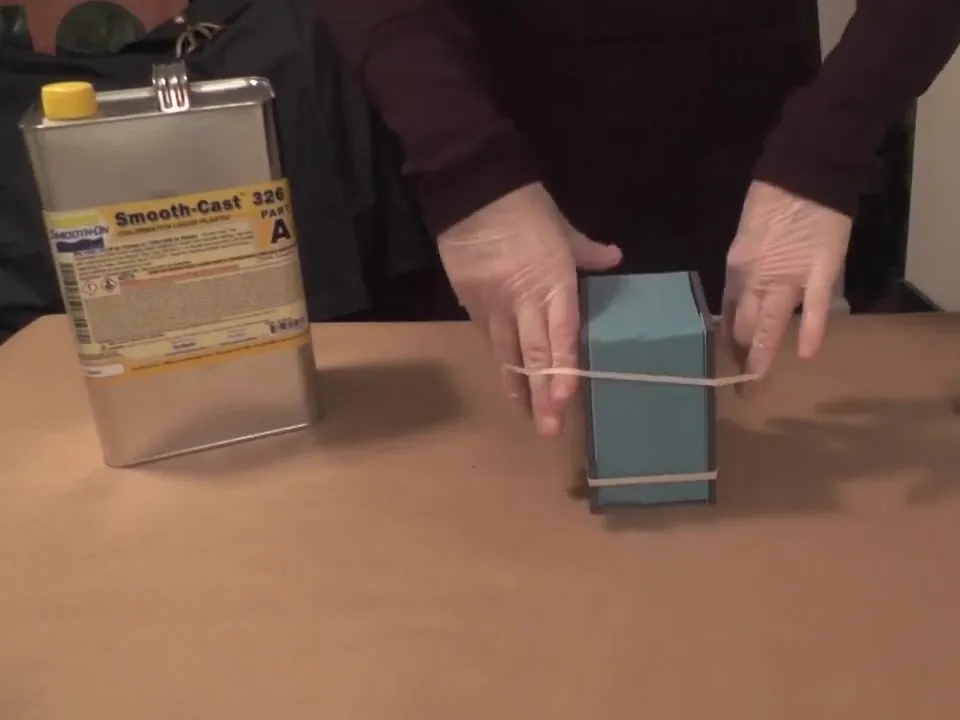
The first step is to put the mold halves together and secure them tightly with rubber bands to prevent the silicone liquid from leaking out.
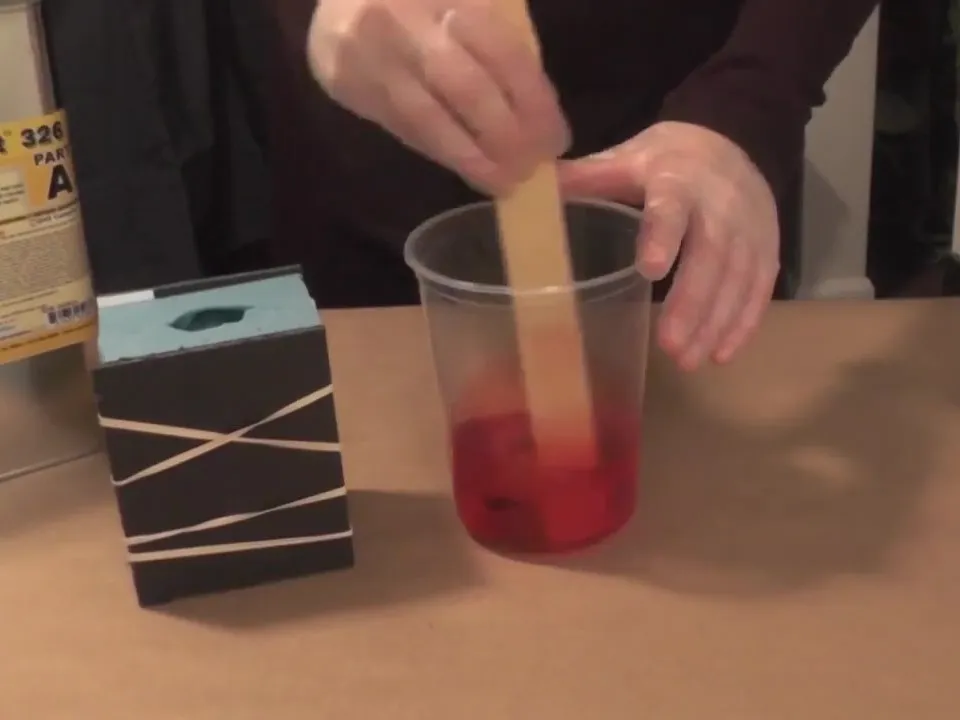
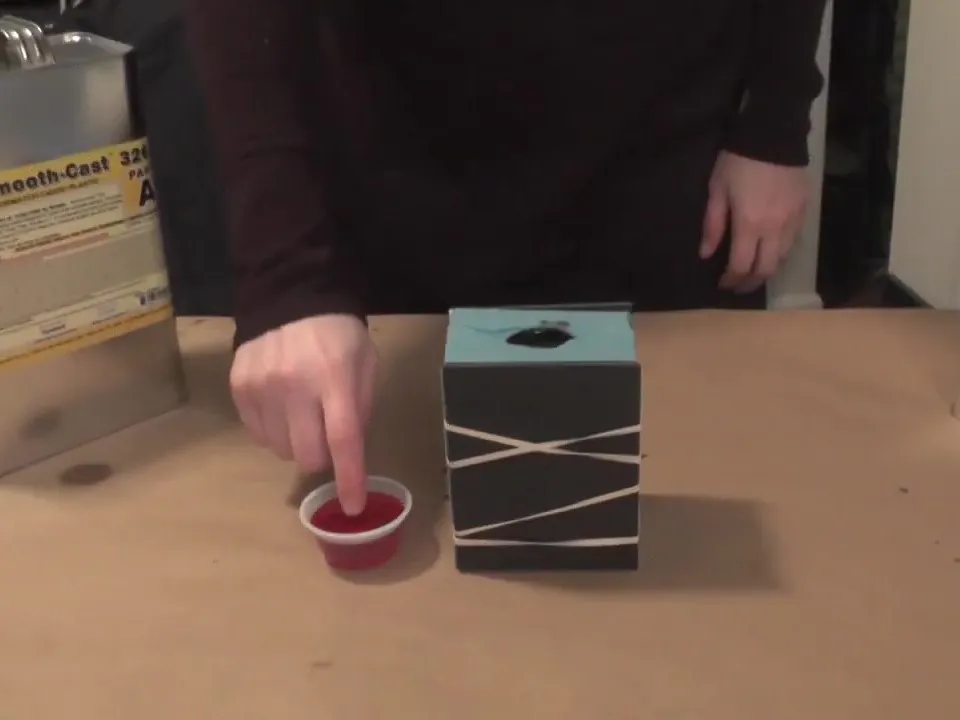
The second step is to mix the resin and hardener in the correct proportions and add some pigment for coloring. Pay attention to the pigment ratio to avoid affecting the overall result.
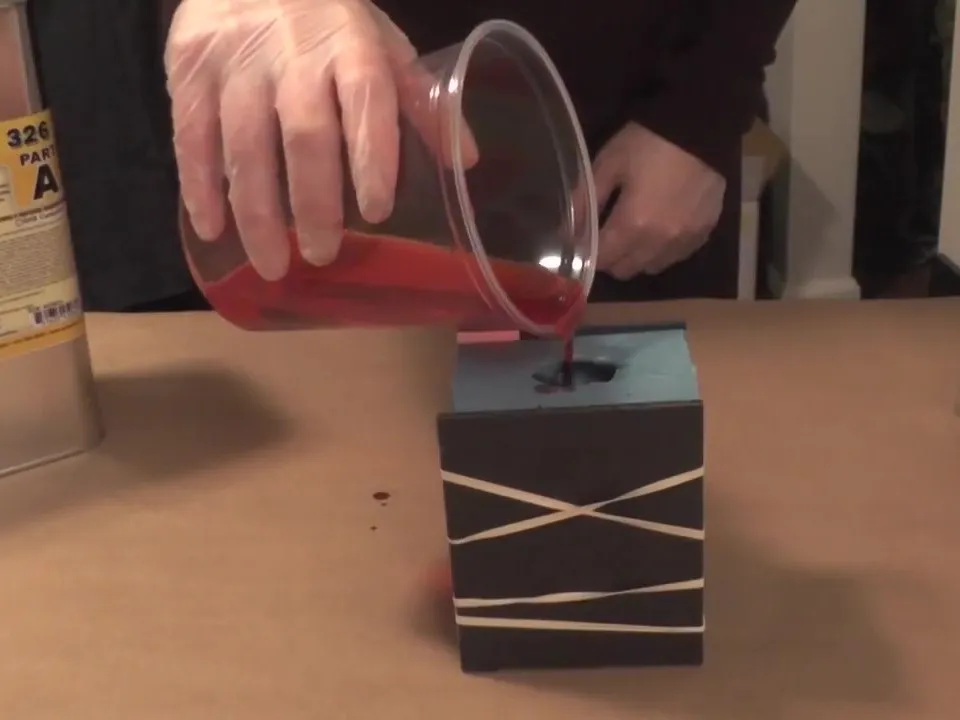
The third step is to pour the mixed resin into the mold, filling it to about half its height. Then, use a hairdryer or heat gun to dry the surface for a few minutes to remove air bubbles.
Step four: Continue pouring the mixed resin into the mold until the desired height is reached. Be careful not to leave any gaps or air bubbles. If air bubbles appear, use a needle or toothpick to remove them.
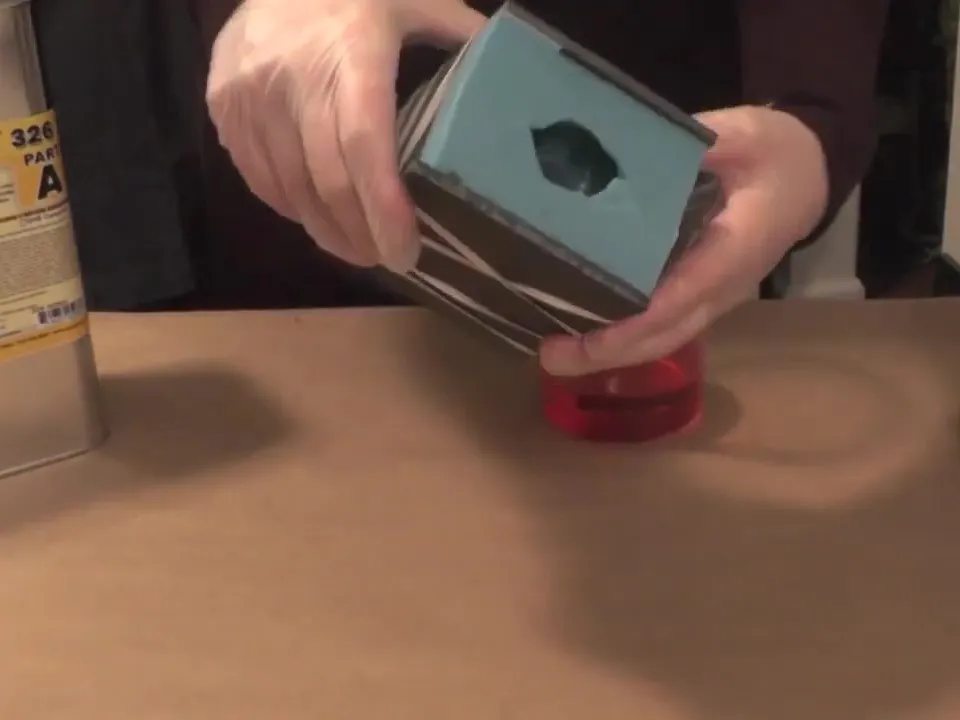
Step five involves allowing the resin to fully cure. This process typically takes anywhere from a few hours to several days, depending on factors such as the type of resin used, temperature, and humidity.
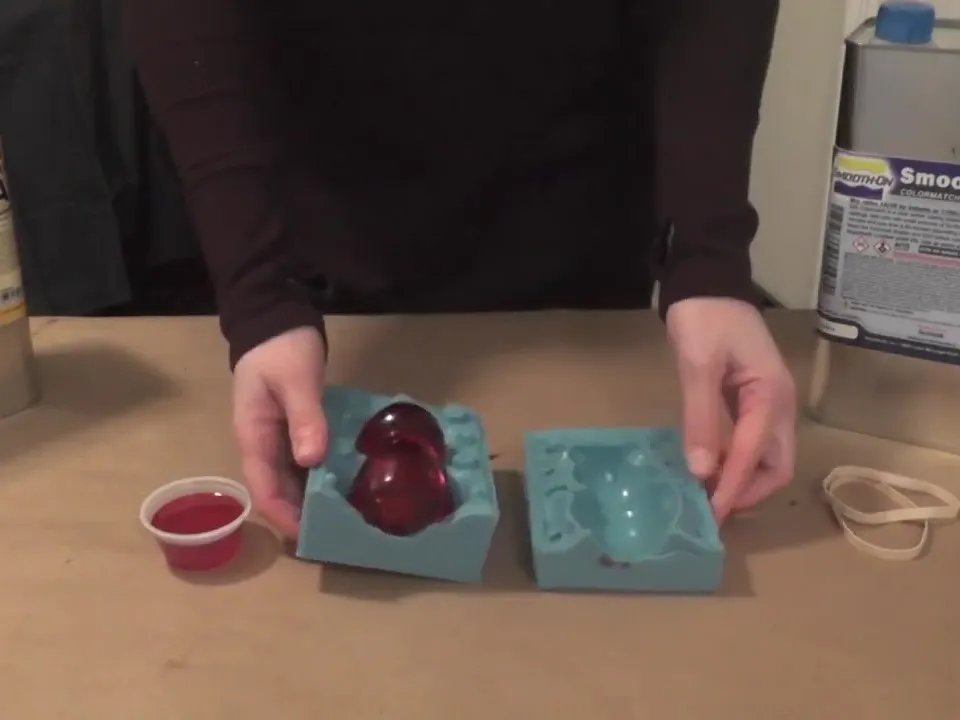
Finally, the hardened sculpture is removed from the mold, polished, and painted. During polishing, ensure that the lines are sharp and the surface details are clearly defined. When painting, choose suitable pigments and brushes to achieve the desired effect.